
If anyone still reads my journal - I'm STILL ALIVE! I know I rarely update, but I'm still doing some taxidermy. Yes, it's more like semi-part-time now due to Lily, but I'm still working and looking forward to taking in some deer this season! Some things that have happened this past year... I have done two deer heads for Nascar driver Ryan Newman, and have yet another deer head, and a lifesize beaver in the works for him. These were his FIRST deer he's ever had mounted.. what an honor!
A bobcat, in progress..

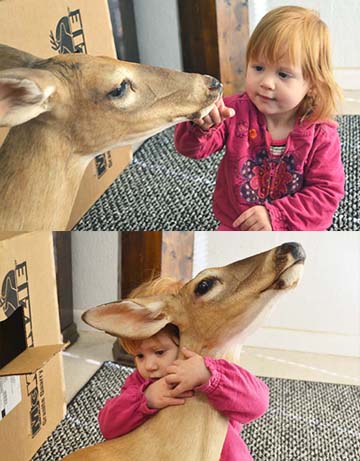
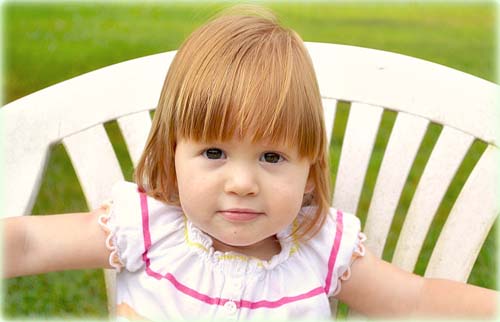
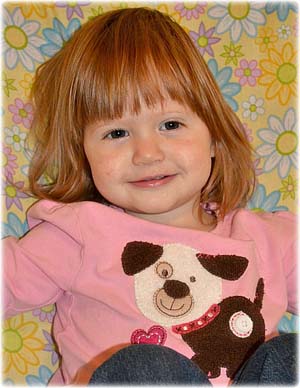
And a few updated pictures of Lily, who will be 18 months old tomorrow!
11.02.10
Hello to those who may still follow my journal.. I don't get to update much any more! I have only done a few taxidermy projects this year, due to being a new mom. Lily is six months old now and growing like a weed. I won't be taking in much work this fall, but hope to get back in the swing of things next year.
We are currently planning on going to the world show next May! I will update from time to time as I work on new projects!
4.22.10
Well I haven't updated in a looong time, but for good reason I guess.
I had a good deer season .. I limited my intake by not advertising and only did mounts for my best clients. I did a total of 18 deer heads and some other small mammals, before temporarily "retiring" at the end of February due to the pregnancy.
My daughter, Lily Elisabeth Carter, was born April 14th, 11:11pm., 8 lbs. 1 oz. and 20" long! It's a lot of work learning to care for a new baby, but I love her to death and she is the greatest thing to have ever happened in my life.


For those who may be wondering -- I am not quitting taxidermy!! But I definately need the summer off for sure. So I am not accepting any work at this time, but check with me in the fall. Depending on how things are adjusting, I will most likely take in a select amount of work!
10.22.09
Ah, where to begin ...
I really feel bad about taking so long to update my journal. But that means this update will just be a really GOOD one! :)
Back in January, I went to Canada once again to visit Ken Walker. This trip was top secret (thus the reason for me not writing about it in my last update). Although I didn't intend to wait THIS long to write about it. See, Ken had called me up and asked if I wanted to do a combined artist piece with him for the 2009 World Show. How could I pass up an offer like that??
So up to Canada I went, and we spent a week working on three canadian lynx - a mother, and two juvenille kittens. Yes, we did THREE competition mounts all in the course of one short week. The mother cat was mounted on one of Ken's commercial forms, slightly altered. The jumping kitten was mounted on another one of Ken's commercial forms, though it was very heavily altered. But the rolling kitten was my special project ... I wanted to learn how to hand carve forms.. so, using the carcass as a guide, Ken taught me how to carve a body and I hand-carved the form for the kitten. It was a lot of work, but it was so rewarding! The result was a form that fit perfectly, and it was made from scratch! I also made a jawset for the kitten, similar to how I had done the marten and other mounts in the past.
Me with my partially completed carving:
Mounting the leaping kitten:
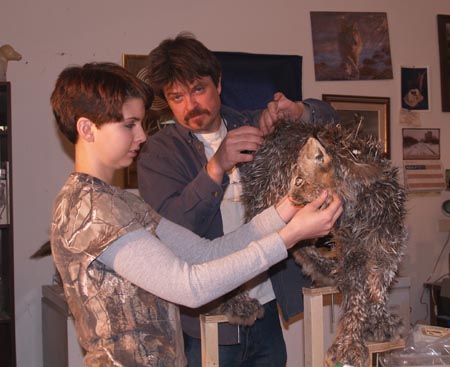
Here I am adjusting the face on the mother cat, while Ken sews (yes, I gave him the boring work!)
Just in the nick of time (literally, 11pm the night before I was to leave at 4am) we sewed up the last mount.
Here we are with the three mounts:
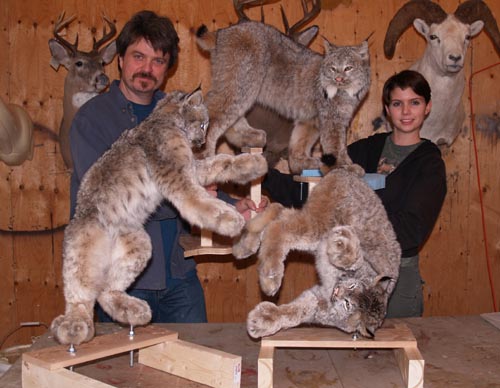
Ken's job would be to do the finish work on them, and make a habitat base.
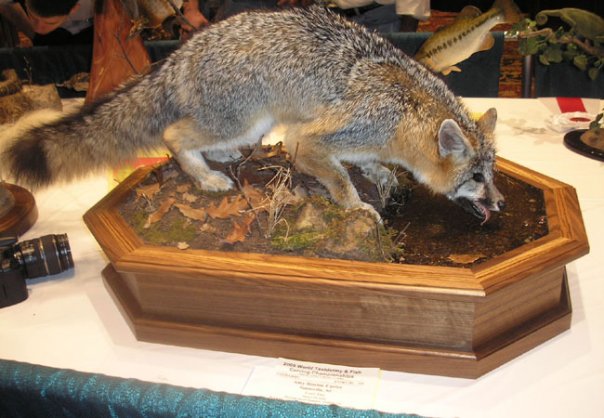
So I went home with my new knowledge, and began working on my own competition piece. I had an idea for a grey fox "drinking" at the edge of a water puddle. I hand carved a custom form, just like I did in Canada, and even sculpted and cast a head for the fox. It turned out great.. Somewhere I have photos of the fox mounting process, but they are somewhere on a CD from when my old computer crashed this summer .. I will post them once I dig them out, but for now, here is a picture of the completed mount..
I went out on a limb and entered in the Masters division at the World Show. I did not end up placing (neither did alot of others..at the world show there is only ONE first, second, and third in the the whole category), but I wanted to get a really good critique- which I did, and learned a lot. I did take this fox to the NC state show later on, and won 1st place Masters with him .. more on that later..
Once at the show, I met up with Ken and was so excited to see the habitat he had put together for the lynx.. This picture does not do it justice!!
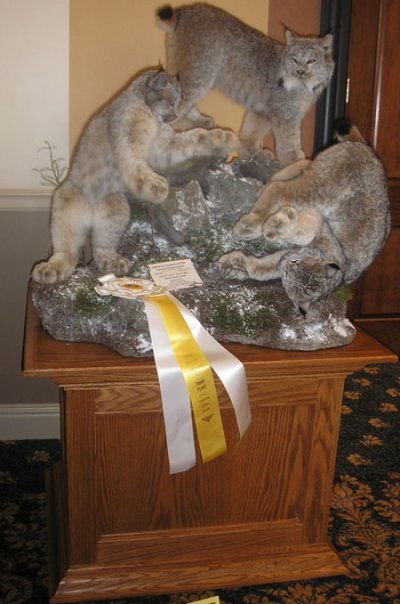
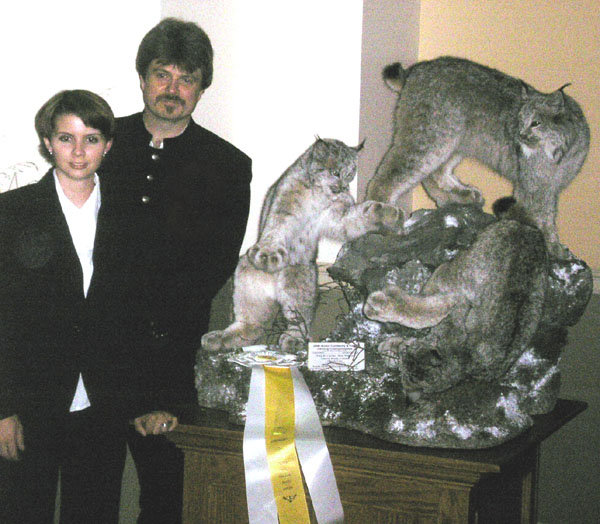
We ended up winning 3rd place in the Collective Artists division, which was quite an honor. Ken even let me keep the ribbon! Here we are with the piece, before the awards banquet .. the lighting was very low at this point, that's why the picture is so bad..
The lynx were later featured in an issue of Breakthrough magazine..

It was a really fun time at the World Show this year, and I can't wait to go to the next one!!
So, later on in July, I attended the NC State show which I never miss! I entered several things ..
My fox got the blue in Masters Division. I entered my stingray too - remember him? Yes, I made a base for him and decided to see what he would score in the reproduction category. He ended up winning a blue ribbon, "Best of Category", and "Best Reproduction Fish"!

I also entered a painting I did of a red fox, and it won in the original art category:

So yeah, it was a good year!
Now all the competitions are over for the year, and I've just been working on some customer stuff.
A small sampling of some customer work I've done recently...
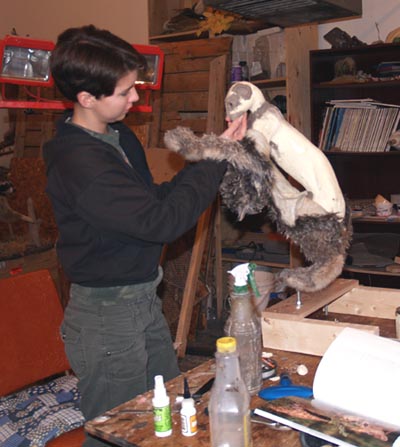
A pine marten

A domestic cat! (Carved body, once again)

Tiny baby opossum

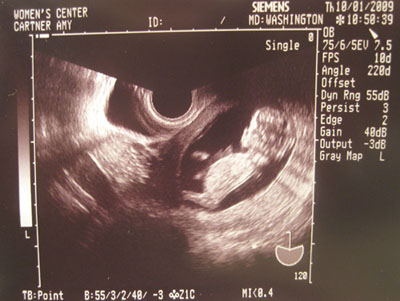
Well, I guess that's about it for now... OH YEAH, last but certainly not least .. the biggest news is that I'm going to have a BABY! No kidding.. I've been creating more than just fine taxidermy lately. The little one is due mid-April of next year. It's probably gonna put a hitch in the taxidermy for a little while, but I know it is going to be great. I'm still taking in deer heads this year (but limiting my numbers so I can complete them all by February). Then we'll just take it one day at a time!
The future little taxidermist, maybe? ;)
That's it for now!
3.24.09
Well, in the past few months I've been very busy, mainly working on customer mounts. Around 20 deer heads have returned to their owners, but I still have about 25 to go!
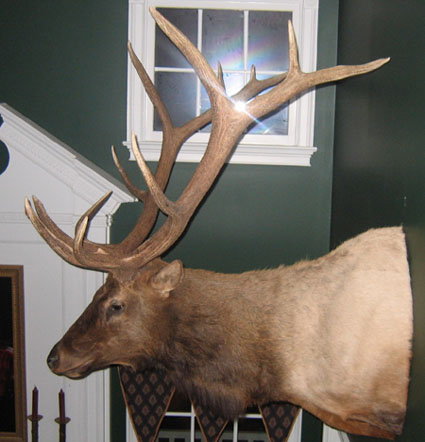
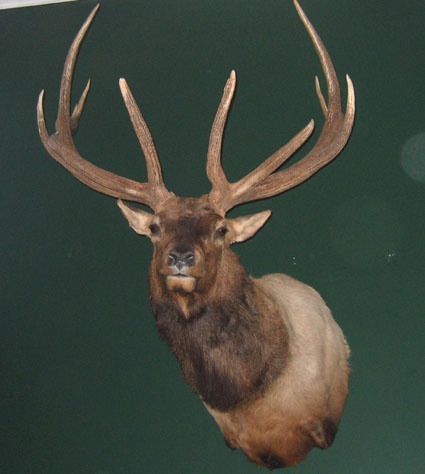
The large new mexico elk was also completed! What a project! Here are some photos...
Me getting ready to put the hide on the form

Loading the mount into the trailer
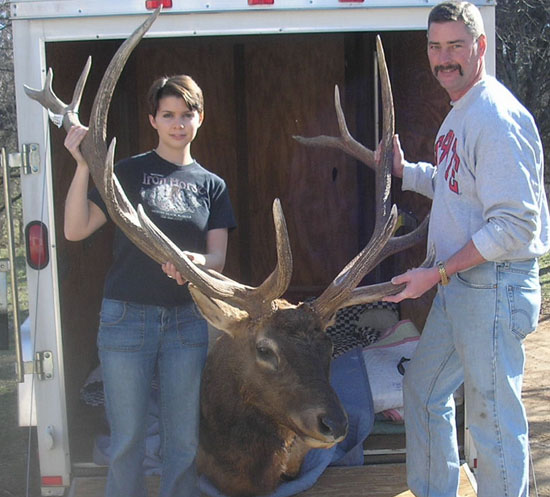
Finished pictures
Lately I've been working on mounts for the WORLD SHOW, which is now only six weeks away. Of course I can't show my mounts yet .. but I'm taking at least two pieces. And there will be one big surprise too! Stay tuned for an update to that, later in May.
12.27.08
Time for an update!! I hope everyone had a very merry Christmas .. I did!
This deer season was a good one for me! As of right now, I have 36 shoulder mounts to do (that's more than I had this time last year) with more coming in every week. Check out the antler rack .. it's packed full
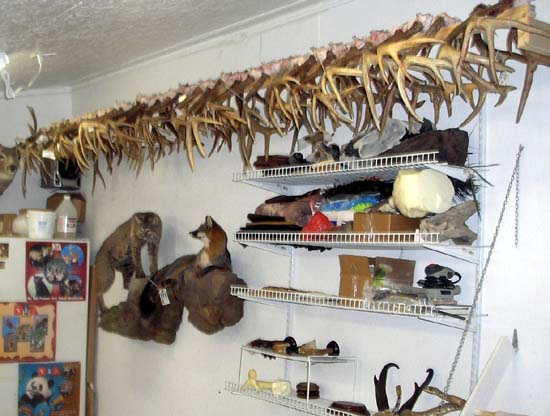
This includes deer from all over the country .. some whoppers from Illinois and Montana .. and even two mule deer. I also have an antelope, and an enormous 360+ class elk from New Mexico. It's every bit as big (if not bigger) than the Canadian elk previously seen in the journal. Look for photos of it, coming in March!
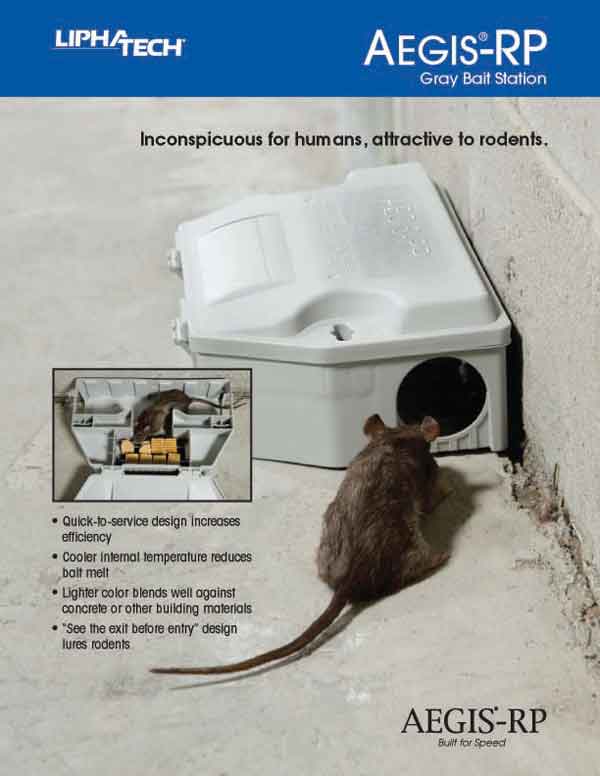
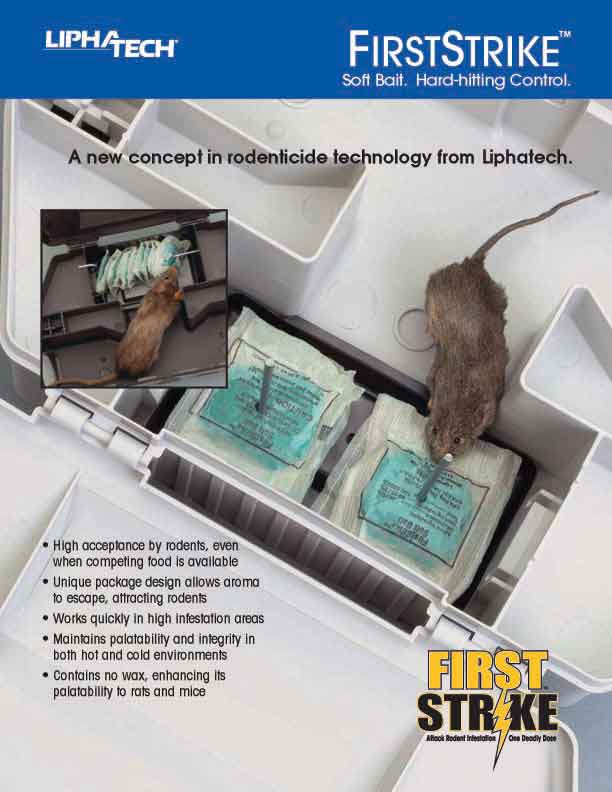
Earlier in the summer I wrote about doing some rats for a rodent control company called Liphatech. They make plastic enclosed traps for rats and mice that can be used as a snap trap, glue trap, OR poison trap. They wanted to take photos of the rodents interacting with their traps, but using live rodents was out of the question .. so, I mounted a set of Norway rats, Roof rats, and field mice, for use in their photos. And they sent me some pictures of the finished ads!
Here is a picture of one ad.. click the links below to see the rest. All rats/mice in these pictures are my mounts, not live!
I also did my first bear a couple months ago. This is a poor quality photo, but you get the idea. The hide was given to me by a good friend, and I decided to do a half lifesize since I did not have room in my showroom for a full bear. This was mounted on a Vandykes form with a Mckenzie "Cast Lip" changeout head. It made the finish work of the mouth really easy...

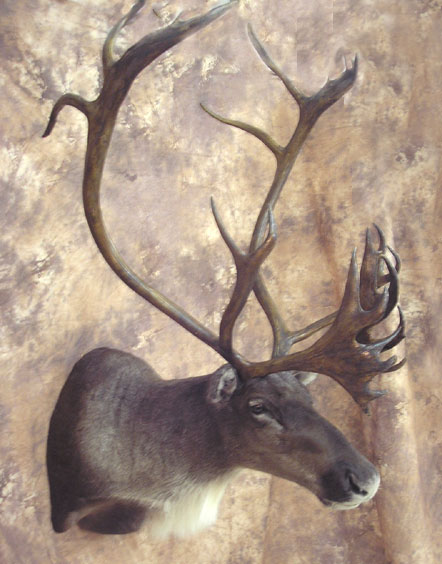
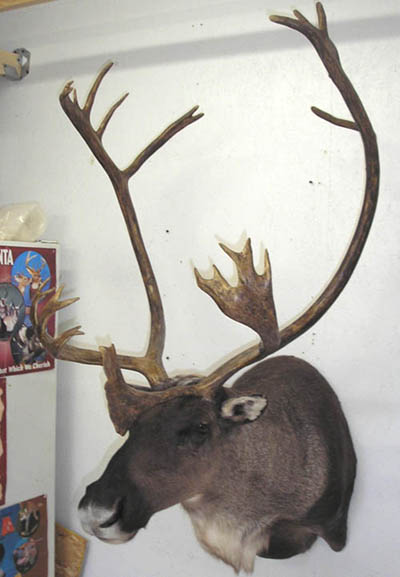
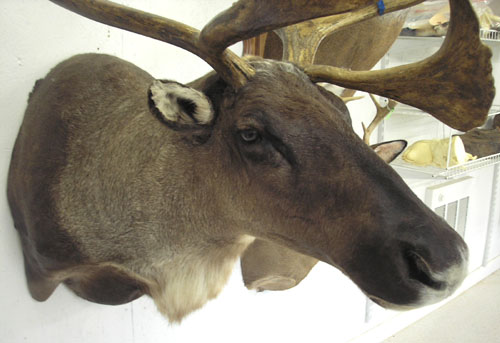
I also mounted another Alaskan caribou .. this one very similar to the last, but smaller
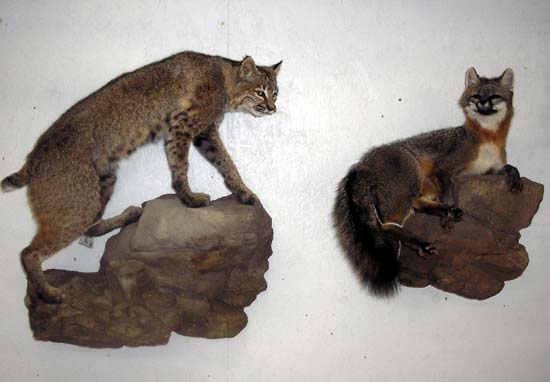
Here's a couple new mounts, both mounted on very nice Ozark Woods forms, and matching rocks.
Well that's about it for now folks .. I will be working very hard on customer mounts for the next few months, then try to focus some attention on doing some competition pieces. I will be attending the World Show in St. Charles, MO in early May, and have to get ready for that!
08.25.08
I have been meaning to post the results of the 2008 North Carolina Taxidermy Show!
I took two pieces - an alaskan lynx, and a ringtail.
The lynx was mounted on a commercial form which I altered into an open mouth. I made the jawset using a combination of real teeth, cast tongue, and sculptured interior. Robby made the beautiful base for me, and the habitat was created using over twenty artificial rocks which I made with my new silicone molding technique. I entered the lynx in the masters division, and got 1st place (score of 95), along the the people choice "Best Mammal" award!


My little brother and sister were able to come to the show and see the mounts!

My ringtail cat was an all-original piece. I carcass casted the form, and made the jawset in a similar way to the lynx. I scored a 92 with this piece, earning the 2nd place ribbon.

It was a very exciting show and I look forward to next year!!
Ok, so for an update on stuff I have been working on lately...
Last month I was contacted by a pest control company that needed some rats and mice for a photo shoot. Well, I'm the one to contact for all your rodent needs!
They shipped me four norway rats, and four mice, to be mounted in different poses. They would be taking photos of them interacting with their new brand of rat and mouse traps, to be put in a print ad. They needed one scurrying into the trap, one interacting with bait within the trap, one looking DEAD, and one standing up.
Here is what happens when a rodent comes across this new trap..
Rat enters trap:

Rat eats the bait (there is also a snap-trap that can go inside):

Rat DIES!

Here's a group photo of the eight mounts right before I sent them off.

Well that's it for now, but I've got a bunch of fun upcoming projects..
A half mount black bear (for myself! yay!), and another caribou has been shipped to me from Alaska to do for a local customer.
08.24.08
Today, I'm going to be showing you something that is completely different than anything I've shown in the journal!
I was planning on doing a traditional "skin mount", until I was advised by fellow fish taxidermists, that this would not turn out well. Apparently stingrays have oily skin that is near impossible to tan. I'd end up with a shriveled mount that bared little resemblance to a live ray. So, a "reproduction" was the way to go.
After some research, I learned how to mold and cast my very own stingray reproduction. And here, for your viewing pleasure, is the process.
1. Here is the ray after thawing out

2. I mixed up some "high fiber" which is a very smooth, clay-like compound used as a bedding material. I removed his tail, which I will cast separately. Then the ray was placed into the material. I used the handle of a small screwdriver to make "keys" in the bedding material around the ray. These will aid in getting the two halves of the mold together in the right position.

3. Clay was used to plug the holes behind the eyes, as these would make the finished cast really hard to demold

4. I mixed up a 50/50 mix of bondo and fiberglass resin, and quickly brushed it all over the ray and surrounding bedding material.

5. After that hardened, fiberglass mat was laid over top.

6. Then, a layer of fiberglass resin was brushed over top of the mat. Once this hardens, it makes a super-strong "shell".

7. I then lifted the ray up and flipped it over, and removed the bedding material. This is a view from the bottom. I applied vasaline to the exposed bondo edges, and repeated the exact same process as above.

8. Once everything had hardened, I simply pried the two halves apart with a screwdriver. This photo shows the two mold halves. You can see the smaller tail mold in the back, which was molded in the exact same way.

Then came the work of preparing the mold for casting. I spent a day applying "Johnson's Paste Wax" to the inside of the mold. I would apply a coat, let it dry to a haze, and then buff it to a high gloss. I did 6 coats of wax on this mold. After the first casting, you can cut down on the amount of waxings, but a brand new mold needs to be well waxed for it's first cast.
Finally, I sprayed a coat of PVA (Polyvinyl alcohol) onto the inside of the molds. This is a liquid that dries into a very thin film. This will help greatly with release of the casting. I let this dry overnight, and then it was casting time!
9. First step was to apply the gelcoat. Gelcoat is a white fiberglass resin that picks up detail really well. I brushed a coat of it on the inside of the molds and let it set up.

10. Then I set a wood block inside the "body" of the mold, and poured solid fiberglass resin around it. I also took resin and spread it all the way to the edges of the mold, covering everything including the "keys".

11. I spread the resin on both sides of the mold, and very quickly put the two pieces together and clamped them. I waited for it to set up and harden.

12. Thanks to the PVA film, the two sides opened up easily and the casting popped out with little resistance! Here is what it looked like straight out of the mold. Doesn't look like much yet, does it!

Here it is after I cleaned it up a little .. still got a way to go on it

After this, I spent time detailing the cast. I used apoxie sculpt to fill in small areas that didn't come out just right, hollowed out the holes behind the eyes (that I had filled with clay), and rebuilt the "eye bulges".
I then primed it with white primer, and airbrushed it!
So here is "Raymond", finished!


I'm very proud of my first attempt! I look forward to using this method to cast other things, such as reptiles!
Ok, here is what has been going on in the last couple months..
I finished up all my deer heads, except for two, that will be mounted this week. I have been accepting some wholesale work from other taxidermists, which I usually do during the summer. I have several interesting things I will be working on in the next month or so, including two black bear cubs.
I did my first Alaskan caribou mount. It was about the size of an elk, but it had a smaller neck. The customer, from Virginia, was going to have a taxidermist in Alaska mount it, but when he found out how high shipping would be .. he looked for someone a little more local. I wish I had taken pictures of the antlers when they first came in. The caribou had been shot in velvet, and the taxidermist in Alaska had stripped and dried the antlers. They were solid white with large black areas of dried blood. I had to take them through a whitening process by mixing up a strong peroxide powder, pasting it onto the antlers, and then wrapping them in saran wrap to sit for a day or so. After I had lightened the black areas, I stained them with wood stain. Making those antlers look lifelike again was a project in itself .. mounting the caribou was a lot easier!
Here's some photos of the caribou.
The customer was very happy with his caribou, and after helping him strap the mount down in the bed of his truck, it was off to its new home ..
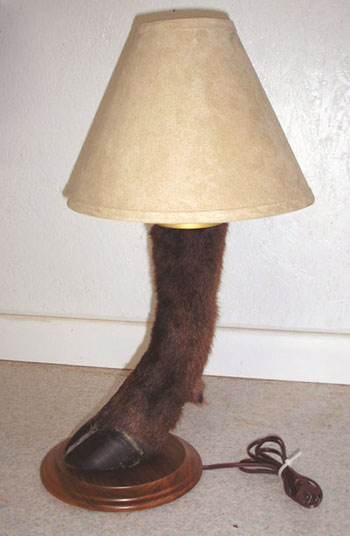
A unusual small project I did was a buffalo foot lamp (pictured below) as well as a buffalo foot pen holder. These were for a good friend of mine who collects anything having to do with buffalo!
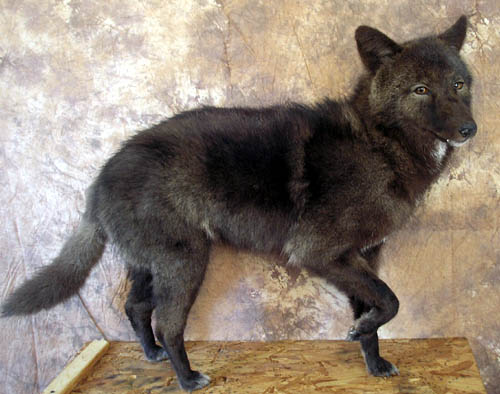
Some mounts I finished up a while back .. found them in the files and though it would share. A black coyote:
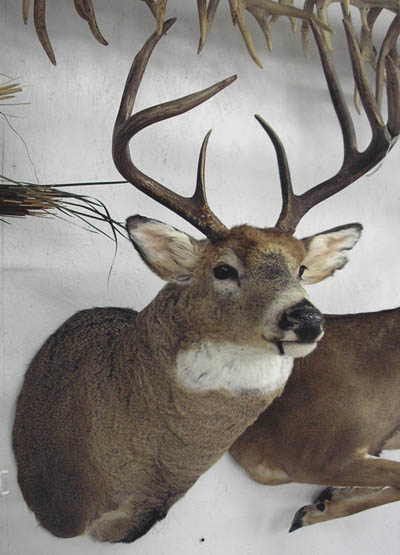
The second largest deer of the season, a buck from Alberta Canada:
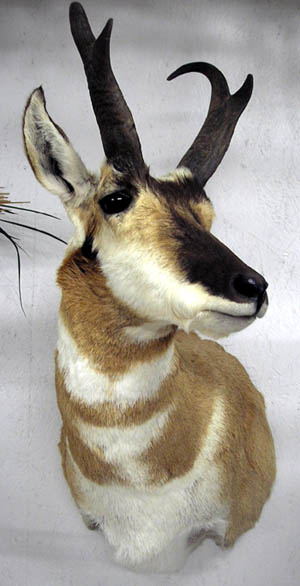
A customer's pronghorn antelope from Montana:
5.28.08
Yesterday I practiced molding and casting a ROCK! And what can I say, I'm hooked!
All it cost to make the mold was $2.40 for one tube of clear silicone caulk from Walmart.
First I selected a small rock, about 6" around. Even a rock this size weighs alot, so putting real rocks in a habitat base is just out of the question.
I began by rubbing a thin coat of petroleum jelly on the rock to act as a mold release. Then I put a very thin layer of the silicone caulk all over the rock, smoothing it with water. This thin coat captures the detail.
I let it dry about 1 1/2 hours and then made the second coat. I piped the tube of caulk into a cup, and mixed about a teaspoon of acrylic paint in with it. This was an amazing tip I learned from another taxidermist. Apparently silicone is water-activated, and the moisture from the paint causes it to set MUCH quicker. I layered that coat on the rock quite thick, and in 45 minutes, It was ready to pull off the rock. There isn't much silicone will stick to, and with the addition of the petroleum jelly, it just came right off the rock.
I mixed up a half cup of some por-a-cast (2-part liquid plastic) and tinted it grey with some lacquer paint. Then I poured it inside the silicone mold and "rolled" it around, coating the inside, until it hardened. Then I mixed up some expanding foam and poured it inside the rock mold.
After this was cured, all I had to do was flex the silicone, and my "rock" popped out!! I made two of them that afternoon, and painted them both a little differently.
Here are the results .. there is the original rock (dark reddish one), the mold, and the two fakes!
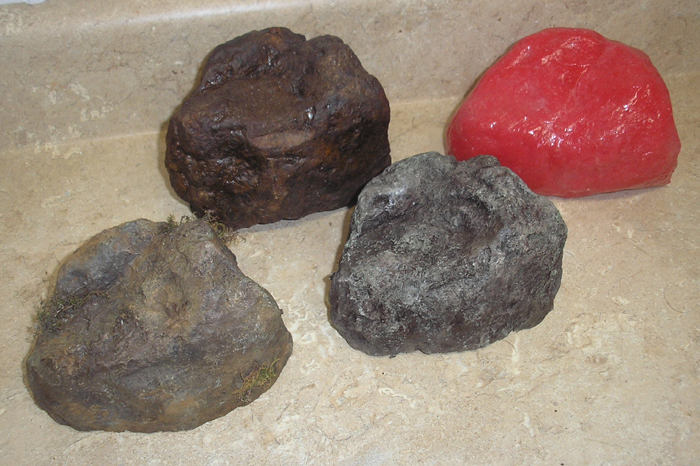
Although silicone isn't a permanent mold (it will start to break down or tear eventually) I should be able to get quite a few pulls out of this mold. I'm now looking forward to molding a variety of shapes and sizes of rocks, to use in my customer mounts. I'd like to go up to the mountains and mold some rocks there ... all I need is a backpack full of caulk tubes and an afternoon!