03.15.08
I've been going through some pictures and here are some new mounts .. some very recent, some from a couple months ago.
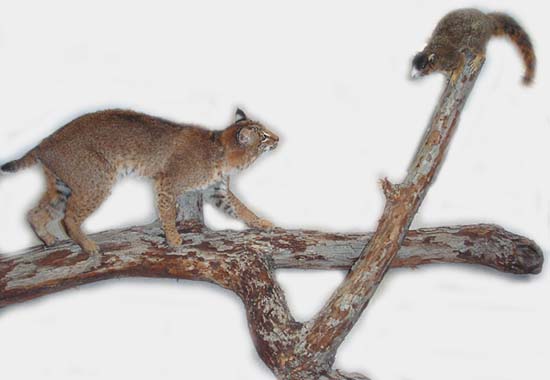
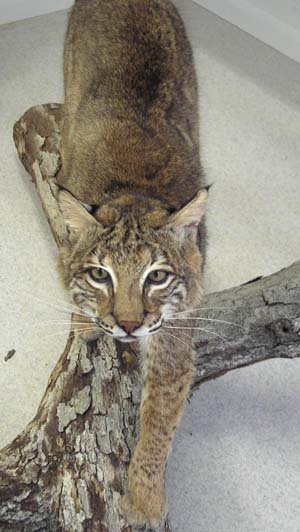
This one just went back to the customer. When he brought the animals over, he also brought a large tree branch to mount them on. It turned out very nice!

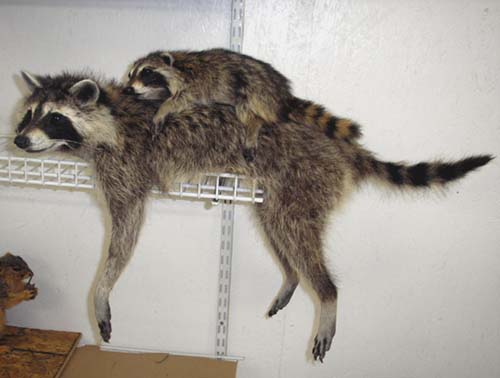
Here is a mama coon with a baby on her back..
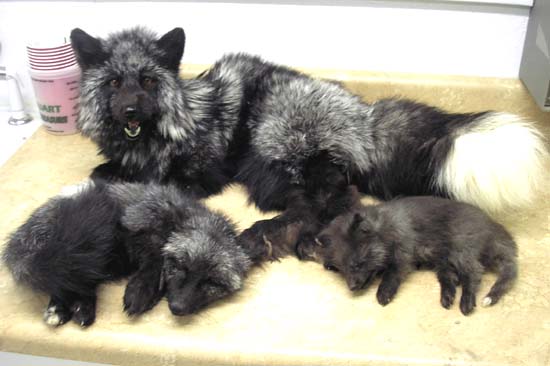
And a mama silver fox, with two babies (of different ages!)
One of my favorites -- the first jackrabbit I've ever done!

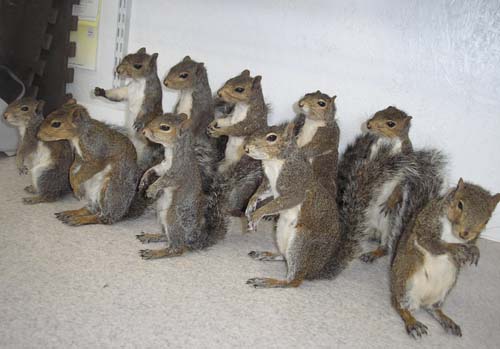
And more squirrels!!
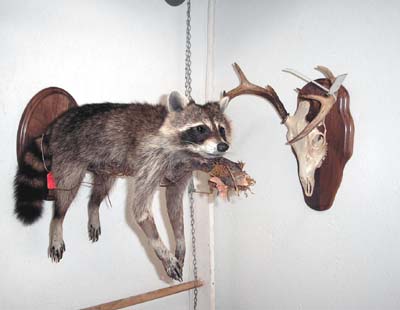
A raccoon wall mount, and a skull mount
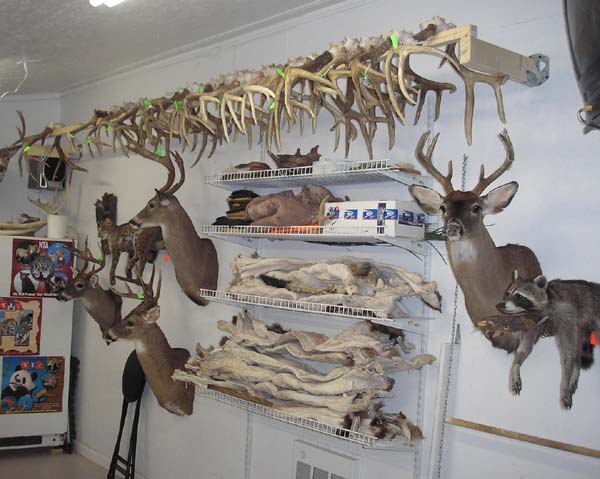
And a current look at the shop .. you can see how many antlers I have overhead, that I have to mount as shoulder mounts. And this is after I mounted nearly two dozen!!
03.09.08
Well after a long time of no updates... I'm back!
The new shop has been great to work in, and I am so much more productive now. The '07 season turned out great. I got in over 40 deer heads, many bobcats, coyotes, and fox, and I've even got a caribou shoulder mount to do.
This month's big news is my latest competition I went to! Last weekend (March 7-8) I went to the South Carolina show in Columbia, SC. This was my first time ever going to this show.
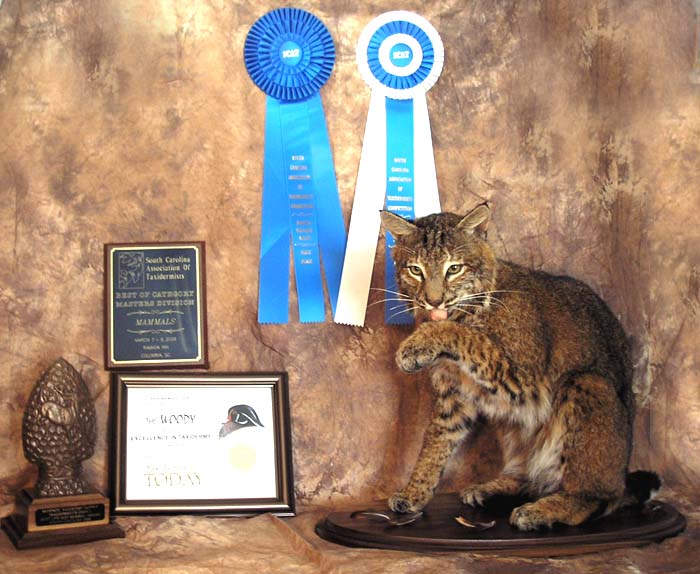
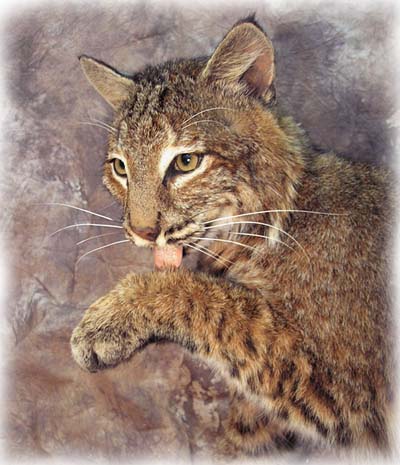
I took one piece - a bobcat, licking it's paw. I used a McKenzie form and altered the left paw, and head. I created the tongue by actually skinning the REAL tongue, filling it with apoxie, and airbrushing it. This produced a really realistic tongue, since you can see the "barbs" on the tongue that cats have. For the base, I chose a simple walnut oval and laid some pheasant feathers around its feet.
I entered it in the Master's division, and ended up receiving:
First Place master's division
Best of Category Master Mammals (ribbon and plaque)
McKenzie "Taxidermist's Choice" Best Mammal
Taxidermy Today "Woody" Award for Excellence in Taxidermy
Here's a photo of the bobcat with its awards:
And an upclose shot:
10.08.07
The new shop is finished!!! We moved everything, and after a couple stressful days, I got everything in it's place. I've already gotten so much done this week, since it's so much more accessible at my house!
Click here to view photos of the new shop!
09.21.07
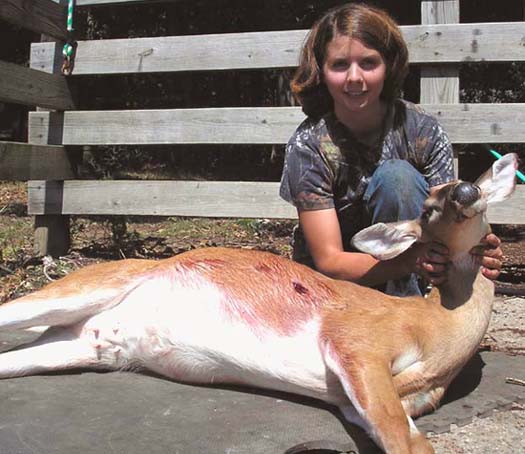
I got my second bowkill deer ever!
After nearly three years since I shot my first deer with a bow - my button buck on 11/16/04 - I got my second deer with a bow!
I shot her Sep. 19th, around 8 am. She came out of the woods and came up to a corn pile I had set out at 20 yards. She was pretty nervous and kept looking around, but did not spook as I stood up and drew my bow. I aimed my pin on her and let the arrow fly.
I watched to see the arrow in her but did not see it as she ran into the woods, so I got out of the stand to take a look. When I saw the tip of the arrow sticking out of the ground my heart sank as I assumed I must have shot underneath her .. then I realized that the arrow was covered in blood. It had gone completely through and out the other side.
Well at this point I was pretty pumped so I made the biggest mistake ever and immediately headed after the blood trail.
What I should have done was given her time to bed down and I would have very likely found her close by. Unfortunately, by me pursuing so quickly, I made her run very deep into the woods.
Finally I found her dead and realized how far I was into the woods. I began the trip of dragging a deer nearly as heavy as me, out of the woods. It took me 2 1/2 hours of dragging before I was able to leave her at a familiar place and call for backup. Robby's dad came and helped me get her the rest of the way. I was absolutely exhausted.
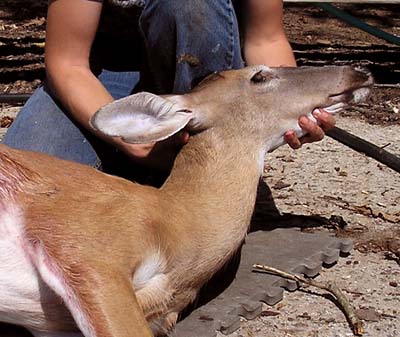
I caped her out and plan on doing a pedestal mount, as she still has her gorgeous orange summer fur. I saved her tail and feet as well, as I try to waste as little as possible. And of course I saved the meat - doe meat is so much better than buck meat! The next night I cooked us some fresh-never-frozen doe back straps and they were very tasty and tender. Here's a few photos!
08.26.07
Well I am going to begin this quite long journal entry by telling you all about what I did the end of July! I went to visit my good friend, Ken Walker, in Alberta, Canada! Ken is a world-champion taxidermist who I have known ever since my first show when I was 15. He is truly one of the best there is, and always willing to share any of his techniques. Back when I saw him at the World Show, he invited me up to his place for a week to learn some advanced techniques that would improve my mounts and hopefully help me to win blue ribbons more often. It was an offer I couldn't resist!
On July 24th I got on the plane and began my trip to Edmonton. Everything went fairly smooth except for going through Canadian customs, I was closely scrutinized. I had brought my spotted skunk (that I took to the World Show) in my carry-on bag as a gift for Ken for being so generous to me. My worst fear was that I would encounter a problem and they would seize the mount, but thankfully I was eventually let through after some questioning and I was able to present the mount to Ken.
Up until I got there, we had not really discussed exactly what I was going to learn there. I mentioned to Ken that I hoped to attend my state taxidermy competition in August, but that I had no new mounts done for the show and I would probably not have time to do any once I got back. Ken suggested that I do a competition piece while I was there in Canada! I said, "that's a great idea - but it has to be entirely done by me - NO help involved!". That's when we went through the freezer and found a big bag of pine martens skins, and came up with the idea to both do one at the same time. That way I could watch Ken's techniques and try to mimic them, while doing all the work myself.
The first thing we did was spend time on the skins themselves. We spent a good several hours just shaving down the face and turning the ears to the extreme edges. I commented that I had never ever spent THAT much time just prepping a skin, but Ken says that makes a huge difference in the way the final mount turns out. Then we filled the ears with bondo and fiberglass chop. I never would have believed I could have made such a thin, competition quality ear with bondo - but I did!
Ken had some rubber rock molds which he let me use to make rocks for the base. The first step was to pour a small amount of tinted cast-all into the mold and slosh it around until it set, making a thin outer shell. Then I simply poured in expanding foam to fill the rest of the mold, and popped it out. What a realistic rock! I attached three of them together into a makeshift base (I would finish the habitat once I got home).
Next we altered the forms. The form was a straight walking pose to begin with. I decided to do mine in a pose walking down rocks, with the head turned back looking over it's shoulder. I would place a limb onto the base and have the marten looking at a feather once it was done. Ken altered his in a similar way, except his marten would be looking much higher. We took our time cutting the legs off and altering each leg, then the head. We also altered the head into an open mouth.
In the below photo, note the small clay figurine. Ken showed me that by making a figurine out of clay, you are able to envision what the mount would look like and choose the best position. Then, by referencing the sculpture, it helps to get the form just right during alteration.

Then it was time to start casting parts ... We took the actual skulls and made rubber molds of the tongue, bottom jaw, and roof of the mouth. Then we cleaned off the meat from the jawbones and laid them in the mold, and poured in cast-all. This yielded a jawset which had the real teeth!

We also made some artificial noses by cutting the nose off of the hide, molding it with a high-detail molding product called "Dragonskin", and then pouring cast-all into the mold.

Once the parts were cast, we installed them on the forms and did the clay work in preparation for mounting.

The mounting part was stressful for me because I am such a perfectionist! Once I got the entire mount put together, I realized that the artificial nose was slightly crooked. It was very slight - but it was driving me crazy. Finally I couldn't stand it any more and took apart what I had spent so long putting together, took the nose off and re-attached it. It took some time, but I was much happier to see that nose on straight!
When all was said and done, the mount looked great. It was probably the fastest I've ever put a competition piece together, but we almost ran out of time. We finished our martens Sunday night, and I was scheduled to leave Tuesday morning. We had just enough time Monday to build a crate for it so it could come back with me on the plane. Here is a photo of us with our martens:

I really had a blast that week. Ken's wife and kids were lots of fun. We went to the Edmonton mall - World's largest mall. I got to eat moose steaks for the first time. And I got to ride llamas! Ken's daughter Chantell has a whole barn full of them, one of which is tame enough to ride. Here I am with Sierra the llama...

I created a photo album with many more photos of my trip to Canada, it's just too much to put on here, so click here to view the photo album from my trip to Canada!
Luckily my marten made it home safely, going as a checked bag on the plane. I was very glad when I saw that box come rolling by at the baggage claim! I also brought back three frozen badgers with me - a mama and two babies - that I will probably mount for next year's show.
Once I got home, it was back to work .. I had only two weeks til state show, and had to complete the habitat and do all the finish work! Ken said the marten was a fine looking mount, but how well it did would have a lot to do with a good finishing job - the pressure was on!
Robby's dad Daryl made a beautiful base for it out of red oak stained to a walnut color (I have Daryl to thank for the base on my sleeping red fox pup, and my coyote waterfall mount as well). I then built up habitat around the rocks, adding grasses and snow, and an unusual "thorn tree" branch I found. I used a technique Ken told me about for making ice on the rocks - I simply mixed a large amount of salt into clear casting resin, and brushed it on the rocks. It made a very realistic "sheet ice" effect! The only thing left was to add a few feathers blowing through the branch .. and it was finished!
I also did another competition mount the day after I got back - a short tailed weasel chasing mice. I already had the form made, so all I had to do was mount it. I always like taking at least two pieces to a show, rather than just one. The form was carved and the legs and tail of the weasel were molded and cast with cast-all for rigidity. I used the actual skull for the head, and sculpted the mouth interior. I mounted the mice on little carved foam forms, so they would be very light (two are attached by one leg, and the middle one is attached just by the tail)
Here are the pieces once they were finished:


State Show
August 17th was the NC state show, and at the suggestion of Ken, I decided to enter into the MASTERS division. I had previously always entered in the Professional division, in which multiple ribbons are given. In Masters, the judging is much more strict and there is only one first, second, and third place ribbon awarded. I was very nervous about it, but I figured - what do I have to lose? At the least, I would learn a lot.
When the competition room opened up, I was thrilled to see a first place masters ribbon on my marten! My weasel had gotten the second place ribbon. After getting my score sheets, I saw the marten had gotten a score of 95 and the weasel just one point under -a 94! I guess I really learned a lot in Canada!
As if that wasn't enough, later on at the awards banquet, the marten won:
North Carolina Trappers Association "Best Furbearer"
McKenzie "Taxidermists Choice" Best Mammal"
... and... the Breakthrough JUDGES BEST OF SHOW award!
Yes, it appears that my marten had the highest score of the show ... I was shocked and thrilled! I could not wait to tell Ken!

Much thanks goes to Ken for teaching me so much. I now realize so many things I have done wrong in the past, and know now how to correct it. I can hardly wait to begin next year's competition pieces. I plan on going to the Piedmont mini-course (Dobson, NC), the Nationals (Lubbock, TX) and of course, state show. There is also a possibility of attending the PA show in Altoona, PA - it's as large as a National show, with lots of cash prizes to be had!
I also have a photo album of more photos from the NCTA Show - click here!
New Exotic Mounts
When things start to slow down in the summer (due to no hunting seasons being open), I turn to wholesale work for income. That is when I do taxidermy work for other taxidermists who are backed up with work. I do the mount at a discounted price, and they complete the finish work and the base. It's a win-win deal for both sides!
This summer I had the opportunity to do some exotic and african mounts for another taxidermist. He does everything - even elephants! - so smaller stuff just ties him down. Here are a few of the exotic critters..
"Capybara"
World's largest RODENT - from South America!

"Genet"
Small cat-like creature from Africa, with a very long tail!

"Coatimundi"
A member of the raccoon family that lives in tropical forests ranging from the southwestern United States, through South America. Adults get fairly large but this was a juvenille that I had to hand-carve a form for.

"African Porcupine"
This porcupine really took a beating at the tannery. When the hide was shipped to me, I immediately deemed the hide completely unmountable due to multiple rips all over, an incision that came all the way up the throat and one foot almost blown off. Then one day I got bored and started working on it, and it turned out quite nicely!!

More recent mounts ... not-so-exotic...
Armadillo

Fawn

Bobcat on rock
